Why You Need a Ceiling Fan

By Sara E. Teller
IF YOU’VE NEVER THOUGHT ABOUT INSTALLING A CEILING FAN, YOU MIGHT WANT TO CONSIDER IT.
 We spoke to Frank Thomas, a top contractor in lower Oakland County with more than 30 years experience, to learn why ceiling fans are such a valued fixture. Thomas specializes in tackling home repairs, full interior/exterior renovations, and flipping homes. Here’s what he had to say.
Sure, the whirling breeze of a ceiling fan feels great on a hot, summer day, but their primary benefit is saving on electricity usage, lowering bills, and helping the environment in the process. Thomas recommends running a fan all the time. He said, “Instead of running the AC in short spurts, a homeowner can constantly run their fan, and this will cool the room down just as effectively while saving money.”
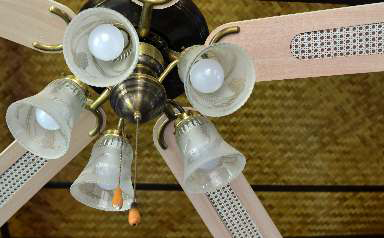
And, to make the most out of the fan’s energy efficiency, Thomas offered this pro tip: “Most people don’t realize it but there is a tiny switch, about the size of a fingernail, just above the blades. This adjusts the draft so that in the summertime there can be a fuller circulation of air. Most of the time, the instructions are tossed after installation or a homeowner doesn’t do it themselves, so this gets overlooked.”
 SELECTING THE PERFECT FAN
IF A CEILING FAN’S KEY BENEFIT IS SAVING ON THE ELECTRIC BILL, what sort of initial investment are we talking about? Thomas said, “The average is anywhere from a very basic fan that’s around $100 to $1,000 or more. It’s a very wide range that depends mainly on quality.”
“Quality” means both aesthetically pleasing and efficient. Thomas explained, “Homeowners often look at aesthetics. They want it to be pretty. However, quality also means the fan operates efficiently. It’s important to consider this, too, when making a purchase.”
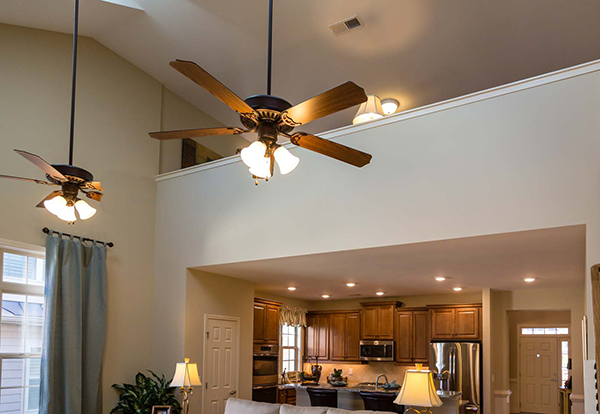
The key is to get a fan that’s adequate for the space. “Homeowners need to look at CFMs, which is the amount of air a fan circulates, as well as the size of the blade,” Thomas said. “The size of the blade should correspond with the size of the room. So, for a smaller kitchen, blades should be around 42 inches. They go up from there to about 52 inches. There are even fans with 60-inch blades that are perfect for large family rooms, vaulted ceilings, or even a small office if it needs to be kept at a cool temperature without running the air conditioning.”
 Here’s another pro tip. If you buy a ceiling fan with a light, plan on buying a new bulb for it, too. Thomas explained, “Most bulbs that come with fans nowadays aren’t really designed to give off much light. The manufacturers assume people will replace these. They package the most energy-efficient bulbs with them.” You might also need to buy some ancillary accessories a la carte to install it, like a brace.
PROPER INSTALLATION
NOW THAT YOU HAVE FOUND YOUR PERFECT CEILING FAN, what’s next? You can always hire a professional contractor, like Thomas, to help you install it. If you like to do things yourself, however, putting one in shouldn’t be too hard. Make sure to read the manufacturer’s instructions, since they will all have variations, and specific configurations will vary, but these are the essential steps you can expect if you are replacing an existing fixture:
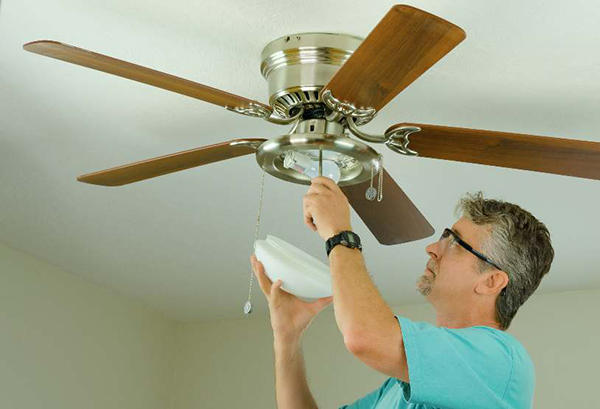
1. Carefully remove what’s there. After turning off the electricity, take off the globe or shade from your existing ceiling light and remove any screws and detach any wires holding it to the ceiling.
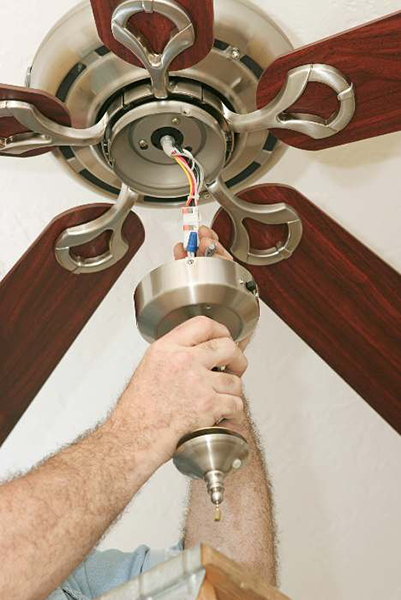
2. Replace the junction box with one that can support the weight of the ceiling fan. If you’re lucky, your current box will be rated for ceiling fan use; however, most standard junction boxes are not. If you need to change it out, disconnect the wires from the box and remove any screws holding it to the ceiling.
3. Install the new junction box. You’ll likely first need to install a ceiling fan brace, which is essentially a metal bar that connects to ceiling joists to support the weight of the fan. Then, a saddle or a bracket with screw holes may need to be attached to the fan brace so you can connect the ceiling box to the brace. Finally, feed the electrical cable through the new box and screw the box to the brace.
4. Wire the fan to the ceiling. Your wiring will depend on the configuration of your house. Secure
the ceiling fan to the ceiling and do any leftover assembly, like attaching the blades to the fan. Don’t forget to turn the electricity back on! After it is up and running, you should be set for many years of cool breezes and lower energy bills.
 About Frank Thomas:
Thomas is an independently licensed contractor with more than 30 years of experience helping homeowners build or renovate their dream homes. A top-rated provider on Angi (formerly Angie’s List), Thomas’ home base (a “traveling office”) is in Royal Oak, and he services lower Oakland County. He can be reached by calling or texting 248-901-6920.

