Selecting & Caring for Your Garden’s Flowers

By Ryan R. Ennis
IN THE SPRING, WHETHER YOU’RE ON A WALK OR A BIKE RIDE, IT’S NATURAL TO PAUSE AND LET YOUR GAZE LINGER over the yards in the neighborhood with the most appeal. Enchanted by the vibrant gardens, you’re stirred with the desire to improve the scenery around your own property. With so many varieties of flowering plants available, it’s understandable to feel some intimidation about where to start.
 According to some landscaping experts, a good way to begin is by figuring out what kinds of flowers you want to plant. The three primary types are called annuals, biennials, and perennials.
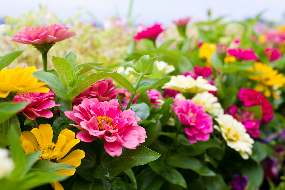
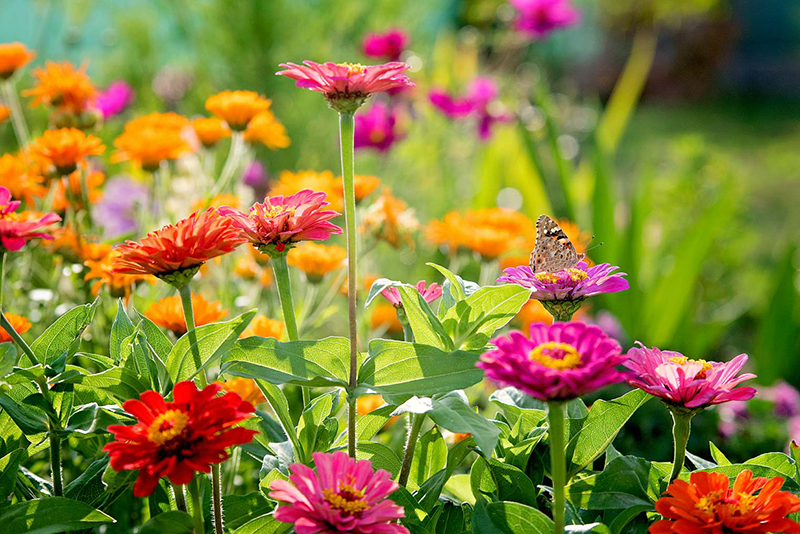
Robbin Yelverton, local florist and owner of Blumz by JR Designs, states that the differences between the flower types are “all based on (their) life cycles.” Annuals grow from a seed to a flowering plant in one season, then die. Examples of annuals include zinnias, petunias, marigolds, and most sunflowers.
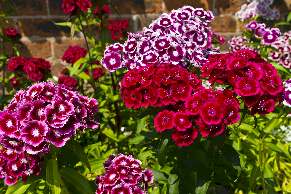
Biennials, on the other hand, take two years to fully develop. During the first year, biennials sprout leaves; during the second, they bloom and make seeds. Some examples of biennials are parsley, sweet William, black-eyed Susan, as well as certain varieties of foxgloves and hollyhocks.
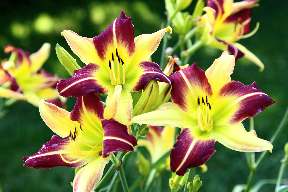
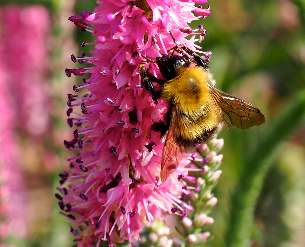
Non-woody, flowering plants that live longer than two years are perennials; some of which are
coneflowers, daylilies, yarrow, and blazing star.
“In the garden,” says Yelverton, “these three types of plants are used for differing purposes.” Some basic reasons are to achieve beauty, to help the environment, or to accomplish a combination of both.
 Some gardeners prefer to add annuals to their beds since these flowers come in many colors. The different varieties are often mixed and matched for visual impact. Another benefit of annuals is that they will grow quicker and bloom longer than perennials and biennials. Toward the middle and end of the season, as perennials and biennials fade and wither, homeowners can fill in the gaps in their gardens with new annuals.
And because annuals don’t come back, there’s no need to worry about them crowding out the plants that will return the following year. A drawback of annuals is that they are highly susceptible to chilly weather and, thus, should only be planted in late spring, usually after the second week of May, when frost exposure is no longer an issue.
CONSEQUENTLY, OTHER GARDENERS CHOOSE TO GROW BIENNIALS because of their hardiness. “They are more tolerant of cold weather and often re-seed more effectively,” explains Yelverton. “Once they are planted, they typically will continue to return for subsequent seasons.” Nevertheless, a disadvantage of planting biennials can be their unpredictability: while it commonly takes two years for them to reach maturity and bloom, some may complete their life cycle in one year, others in three. Therefore, waiting for biennials to fully grow may require patience.
When gardeners want robust vegetation that burst with blooms during the first growing season, they often install perennials to enliven their landscaping. “Once established and well-maintained,” Yelverton says, “a perennial will continue to flower each year for several years. They form the actual structure of the garden since they stay in place for years and continue to grow and expand.” In the process, they supply ground cover and preserve moisture for the soil.
 Another advantage is that they are easily increased by splitting them and replanting the sections
of the original plants to produce new ones. Furthermore, several varieties make the nectar and pollen that bees love to devour. A couple of problems with perennials are that they can be vulnerable to disease and take up more space than annuals in the gardening beds.
AFTER WEIGHING THE PROS AND CONS of the different types of flowers, you may feel ready to head out to the nearest nursery or gardening center and make some purchases. Nonetheless, Dominic Scappaticci, President of the Ferndale Gardening Club, has five other points to keep in mind before buying
any plants.
The first is to promote caterpillars. Asters, hollyhocks, ironweed, and mallows are just some of the plant species that host caterpillars, which birds feed to their babies to ensure the survival of their next generation. The second is to read the instructions that come with the flowers. Based on their spatial, lighting, and watering needs, will they thrive in the locations you’ve picked? The third is to visit a public library: it serves as a good resource with its many books and magazines about gardening, along with its access to database articles covering the topic.
The fourth is to talk to other gardeners during your neighborhood strolls. “You’ll get tips and ideas from them,” offers Scappaticci, “and maybe make a friend.” The fifth is to understand that sometimes plants die, even when you do everything right: “It happens to the most advanced and to the newest gardeners. Don’t let it deter you,” he emphasizes.
 BEFORE BRINGING ANY PLANTS HOME, make sure you have the necessary materials and tools for planting. According to Yelverton, the average home gardener should have at least the following to complete the task: a hand trowel for planting annuals, weeding, and cultivating around the plants; and a quality pair of hand pruners for trimming and pruning. Keeping these items sharp and well-oiled will ensure that they last for many years.
While some may not consider gardening gloves as a tool, wearing a sturdy pair can prevent your hands from receiving abrasions, cuts, and irritations from plant saps and foreign debris in the soil. Yelverton has a trick for ridding yourself of any dirt that penetrates the gloves and settles beneath the fingernails: “Coat your nails heavily with a good hand lotion prior to putting on the gloves. It makes cleaning your nails after the job is done so much easier.” Other common tools needed by gardeners are shovels, forks, rakes, and hoes — all proving useful for breaking up, aerating, and weeding the soil.
AFTER THE TOOLS ARE GATHERED, the next step might involve planning where some new gardening beds will go. Before digging, observe and mentally note how much natural light the areas under consideration will receive. This survey will tell you whether you should put in plants requiring shade, partial shade, or full sun. From there, outline the beds using an old gardening hose or
thick string. The hose or string can be rearranged until you’re satisfied with the shape, “saving you many headaches in the long run,” Scappaticci says. A problem you might discover while digging is that the area has too much clay in it. To amend the earth, mix in some compost or soil conditioners. The products significantly improve the land’s ability to hold in water and nutrients.
 Once the beds have been prepared, Scappaticci recommends another procedure to follow as your plants make their way into the ground. His first suggestion: To promote the plants’ healthiness, “check the flowers over for broken stems or yucky leaves and remove them.” His second: “Dig holes as deep as the length of the soil in the pot and twice as wide,” to ensure the openings will appropriately accommodate your plants’ roots and can be backfilled with the right amount of quality soil and organic matter to cover the root bulb.
His third tip: As you take the plants out of the pot, “use your fingers to massage and loosen roots so
that they don’t stick together.” This method encourages the plants’ roots to spread out in the soil, thereby providing a good foundation for supporting their stem or stalks.

