Effective Drywall Repair

By Ryan R. Ennis
LIKE MOST THINGS IN A HOUSE, DRYWALL IS SUSCEPTIBLE TO WEAR AND DAMAGE OVER TIME.
As the dwelling settles, hairline cracks suddenly form along the ceilings and the walls in the living room. During a move, the side of a heavy storage cabinet accidentally falls forward and hits near the corner of a wall, denting it. Each time a painting or poster changes location in the bedroom, it leaves behind unsightly holes to patch. These are just a few examples of common occurrences that calls for some know-how to repair.
Small holes, shallow dents, and thin cracks in the drywall are often viewed as easy fixes that you can do yourself. However, if these jobs aren’t done right, they can create more problems down the line. Holes will become bigger, dents deeper, and cracks thicker. It can sometimes help to disguise the problems by shuffling around different pieces of artwork and furniture, but that’s not always a guarantee that outsiders won’t see what you’re trying to disguise.
The best solution is following the correct procedures to get the jobs done. Here are some suggestions on how you can restore your walls and ceilings:
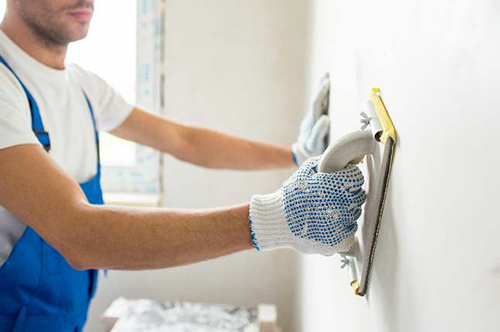 FOR THE SMALL HOLES AND CRACKS, START OFF BY FILLING THEM WITH SPACKLE, then smoothing out the excess with a putty knife so that the area is thoroughly covered. Once the mixture dries, simply sand the spots until they are smooth and ready to be repainted. However, if the diameter of the damage is greater than an inch, you will probably need to tape the spot before spackling. Paper tape works best for corner repairs. If the holes or dents are not directly in the corners, fiberglass mesh tape will do the trick. No matter how steady your hands are, bulges or bubbles in the tape can appear as you lay it down. Try to smooth them out with a putty knife before spackling and sanding. If the putty knife doesn’t help, you might have to take off and re-apply the tape until it’s even with the walls.
Because drywall is vulnerable to nail pops bursting through without warning, you most likely will be faced with mending those as well. When you first notice them, you might believe an easy remedy is dabbing some paint over them. However, a proper fix involves driving them back with a hammer into the wall; then putting in drywall screws over and under the sites of the nail pops. From there, you can level them with joint compound. If this procedure isn’t followed, there’s a likelihood the nail pops will show back up.
Whether you’re dealing with holes, dents, cracks, or nail pops, a typical mistake is sanding the site too vigorously after the compound or spackling dries. When too much pressure is exerted on a wall or corner during sanding, you gamble removing part of the paper face. Once the paper face has been rubbed off, it usually results in a bumpy or uneven surface. That will lead to reapplying the spackling, waiting for the spot to dry again, and then re-sanding the area. To prevent this from happening, you might find it easier to use fine sand (150 grit) paper attached to an electric or a hand sander. For getting into hard-to-reach areas, such as corners, a fine sanding sponge should be sufficient to flatten any unevenness in the compound.
AS A FINISHING STEP TO THE SMALL REPAIRS, YOU WILL GATHER THE SAME SUPPLIES that you initially bought to paint or texture the surfaces before the damage: In other words, the same types of rollers, sponges, brushes, etc. that were initially used to paint or create their smooth, semi-smooth, or rough- er textures. As you paint or apply the texture, make sure to cover not only the location of the repair but also the area around it. After the fresh coat of texture or paint has been blended in with the rest of the wall, the site should look as good as new.
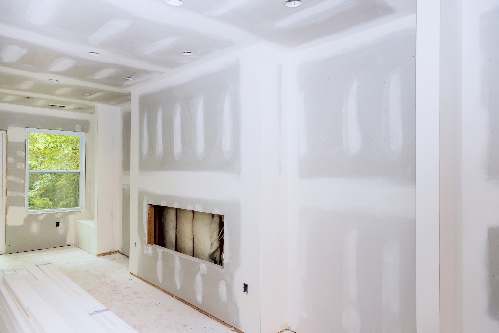 When it comes to repairing larger holes or dents in the drywall, the process becomes more involved. To begin, outline a rectangular shape around the bad area, then use a sturdy single-bladed saw with a sharp point that can punch through and cut out the damaged drywall. Using another sheet of drywall, draw and score a matching rectangular piece. This new piece will be inserted into the wall to cover what was taken out.
To secure the new section, apply joint tape around the seams and then camouflage it with joint compound. If the joint tape fails to hold it in place, try installing some furring (or wooden) strips in the opening where the damaged section was removed. The strips serve as a reinforcement or backing for the new drywall piece as you fasten it in with drywall screws. Once again, you will need to sand to create a level surface before re-painting it.
WHEN IS IT TIME FOR A PROFESSIONAl to step in? Since it’s your home and project, you call the shots. Whether you’re dealing with small wall and ceiling repairs, or looking at a room with massive amounts of drywall damage, it’s perfectly all right at any time to reach out to experts who install drywall for a living. They have the necessary skills and equipment to guarantee the work. To find and hire a reputable drywall contractor near you, check out the website: www.bbb.org.

